The Magic of Plan Regions
Ever run across a situation where you need to see something in plan but it sits above the current view range? Oh, you’re not sure what the view range is or how it works? Here’s how they work.
Every plan and RCP view has a view property called View Range, also known as a visible range. The view range is a set of horizontal planes that control object visibility and display in the view. The horizontal planes are Top Clip Plane, Cut Plane, Bottom Clip Plane, and View Depth.
As their names imply, the top and bottom clip plane represent the topmost and bottommost portion of the view range. The cut plane is a plane that determines at what height certain elements in the view are shown cut. These 3 planes define the primary range of the view range.
View Depth is an additional plane outside of the primary range. You can set the level of view depth to show elements below the Bottom Clip Plane. By default, it is coincident with the Bottom Clip Plane. You can set it to levels below the Bottom Clip Plane.
Elements outside the visible range of the view do not display in the view. The exception to this is if you set the view underlay to a level outside the visible range.
Now that you understand view range, I’m going to show you how to override it. As stated above, there are times when you have elements in your plan that live above the existing view range, such as a clerestory window for example. In these instances you can use a Plan Region to override the existing view range. Here’s how you do it: 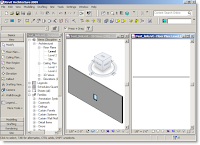 In the plan, where you want to see the element, go to the view tab on the design bar. Select the Plan Region tool. While in sketch mode, draw a rectangle around the element you wish to see. Before finishing the sketch, set the Region Properties so you’ll be able to see the element in the current view. The Plan Region is set up exactly like the View Range in that there are 3 planes. Set them up just like you’re
 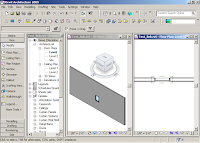 setting the View Range, only higher or lower depending on where the element is. Once the properties are set, click Finish Sketch, you’re done. You should be able to see the element in the plan now. If not, select the Plan Region and adjust the view range until you see the element.
Click here to view the video tutorial.
setting the View Range, only higher or lower depending on where the element is. Once the properties are set, click Finish Sketch, you’re done. You should be able to see the element in the plan now. If not, select the Plan Region and adjust the view range until you see the element.
Click here to view the video tutorial.
Welcome to revitED!
RevitED (Revit Education) and general BIM topics. I've been using Revit now for 11 years, and though I feel I've got a pretty good handle on the software it seems each day I learn something new. I want to share that with the readers of this blog and hope you learn something new as well.
 In the plan, where you want to see the element, go to the view tab on the design bar. Select the Plan Region tool. While in sketch mode, draw a rectangle around the element you wish to see. Before finishing the sketch, set the Region Properties so you’ll be able to see the element in the current view. The Plan Region is set up exactly like the View Range in that there are 3 planes. Set them up just like you’re
  setting the View Range, only higher or lower depending on where the element is. Once the properties are set, click Finish Sketch, you’re done. You should be able to see the element in the plan now. If not, select the Plan Region and adjust the view range until you see the element.
Click here to view the video tutorial.
setting the View Range, only higher or lower depending on where the element is. Once the properties are set, click Finish Sketch, you’re done. You should be able to see the element in the plan now. If not, select the Plan Region and adjust the view range until you see the element.
Click here to view the video tutorial.
No comments:
Post a Comment